Saturday, March 19, 2016

4G's Spring Theme Blog Hop

The Girls, Giggles, Glitter and Glue Facebook group is having a Spring Theme Blog Hop! The 4G's are hoping you'll join us in visiting this event. You'll also have a chance to win prizes as well. So "Hop" on over and see what they have created for you.

TO BE ELIGIBLE TO WIN A PRIZE, YOU MUST:
***Complete the hop - visit and subscribe to all blogs/youtubes and comment on each project.
***Winners will be announced Monday, March 21 on each page you visited.

Here's the line up:

Saturday, March 19 ----

Amanda Rhodes: http://salnclts76.blogspot.com/
Kim Norman https://www.youtube.com/channel/UCBAz0kJjwL69GY-_hZaFhpw
Christy Lepine:  https://youtu.be/3UE8NPiSH9A
Tracy Sagriff:  http://mygrandmasteacups.blogspot.com/2016/03/
Laurie Moore: http://mooreartfromtheheart.blogspot.com/2016/03/4gs-spring-theme-blog-hop.html

Sunday, March 20 ----

Michele Quam: www.Chelmariescreativecorner.blogspot.com
Germaine Fryc: https://www.youtube.com/watch?v=iJ6yqJaYP58
Latanya Townsend-Poelinitz: https://www.youtube.com/watch?v=MWoACkQNYWw
Paula Driver: http://scrapyourworld1.blogspot.com/

************************************************************

Now here's my two projects to share with you. 
Making something to give as a gift or a home decor piece that helps 
"Feed the Birds" 
can be fun and easy.

Now let's rust the lid and make it smell Yummy!
Here's what you'll need.....
This product makes it easy to make something look like it's rusty. 
Take 1 Tblsp. of Rusty Paper in a small bowl and mix in 1 tsp. of instant coffee and 1/2 tsp. of cinnamon. Glue your lid to the ring first and then paint with the rusty mixture. Let dry.
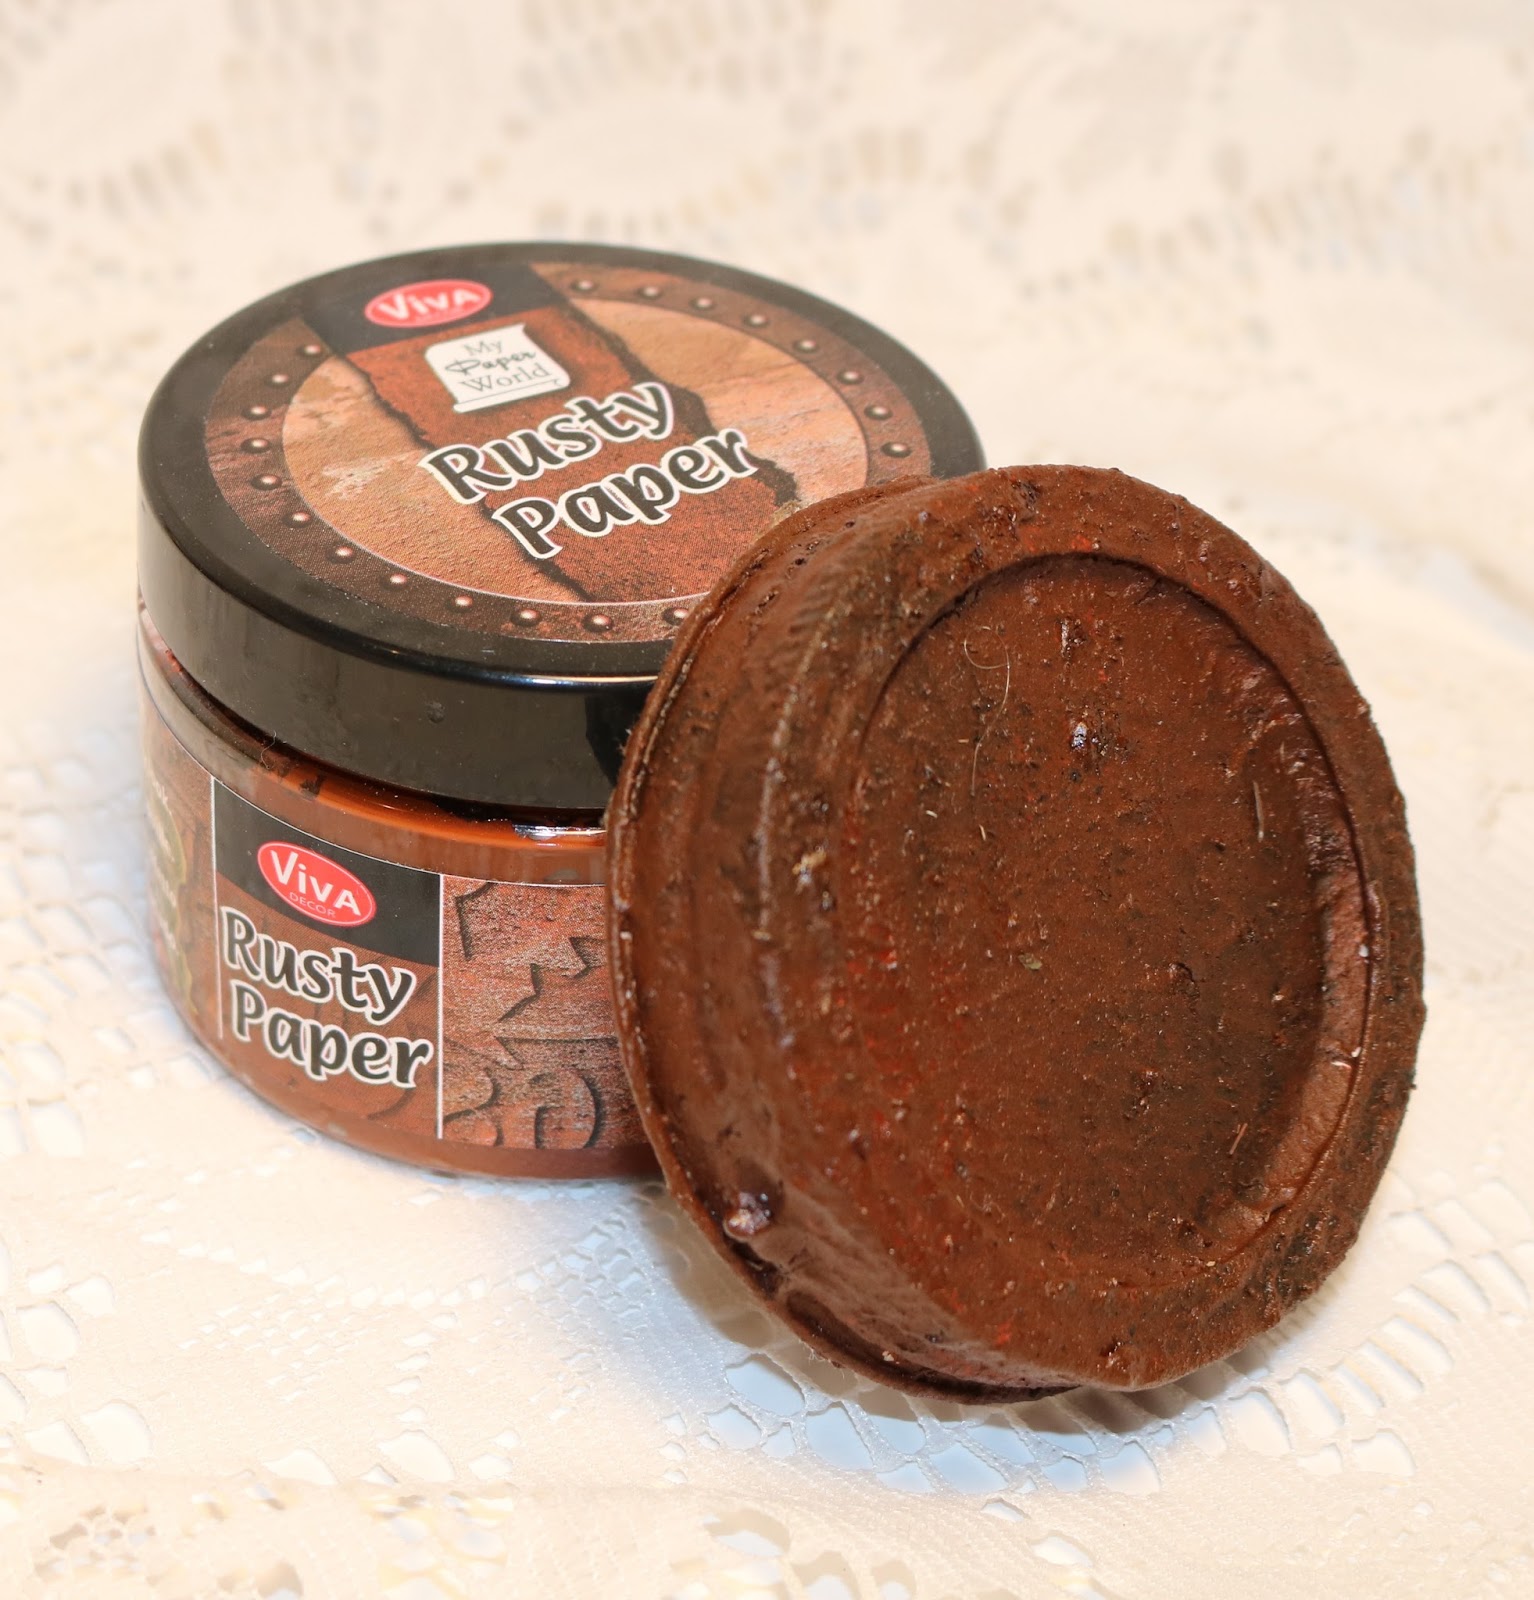
Here's a few more items you will need to complete you project. 
I glued twine ribbon around the jar and added this cute butterfly to a burlap flower on the side.
I stamped and layered the butterfly using Prima's  Marketing-Stamp N Add Stamp and Metal Embellishment Set . For the body, I embossed it using RANGER-Tim Holtz Distress Embossing Powder in Vintage Photo. Then I took take a soft gold wire to create the antenna. 
Now glue a nest to the lid. Add a bird, flowers, twigs and leaves for a nature look. 
Fill your jar with bird seed and enjoy Spring by "Feeding the Birds"

*************************************************************
Project number two.
Spring Canvas!
Start with Canvas turned over to use the back of it. 
This will create your frame. 


Now to add a little mix media to the frame with a mask (Feathers) and Gesso. I also did a little splatter paint drops all over. For one more layer of texture use crackle paint.    


 I carry these sweet Copper Micro Beads Art Ingredients by Prima in my store. They add such wonderful shinny texture to your creations. 
 Glue moss, a nest and a few feathers to the inside corner of your frame.
 Cut out small banner shaped pieces from printed burlap and add stick-on letters then glue on a string. A piece of cardboard stripped down and Gessoed makes a great background for a garden card.
 Add twigs and string for 3-d elements. 

 Now glue a few eggs and mommy bird to the nest. Add your banner and you have created a 
"Spring Canvas"
 I thought it needed just one more surprise element and this rusty old key was just what it needed.

Thanks for Hopping over to visit me. I'd love to read your comments about these two projects. 

Happy Spring to All
Hugs, Laurie 

I'm so happy you took a peek all the way through my post because you get a sneak peek at the prize I will be giving to one luck winner from my page of subscribers who left a comment .


Wednesday, March 2, 2016

Captured Fairy

There's something so enchanting about Fairies that makes you want to capture them and hold the magic inside but only for a moment, then they need to be set free again. 


I found this wonderful idea on Pinterest. The company Gypsy Soul Laser Cuts sells these beautiful chipboard Fairies. I was intrigued by the idea of making a few captured Fairy jars of my own once I saw how they were put together. 
Here how you start....Lot of the products I used I carry in my
Moore Art From The Heart Artfire store so please go take a peek.

I took my Emboss it Dabber and Melt Art in black to create almost an enamel look to the Fairies. This helps them hold up to being glued to the inside of the jar. I did emboss both sides of the Fairies. 

Using a clear small jar I then used Mod Podge to glued tissue paper to it. Next placing the Fairy inside and adding Glass Glitter around the edges. 
With ink sprays I splattered and dripped them down the sides of the jar. Used a stamp to add more layers. I then picked out flowers that matched the sprays I used and placed them on the jar too. A bit of jute twine around the neck of the jar and a quick spray of color to the cork lid and I was done..... Oh and placing a tea light inside to get a peek at the captured Fairy.

    
Thanks for visiting my blog, Please leave your comments if you enjoyed or was inspired by this project.

Magical wishes and dream to you,
Laurie Moore

Thursday, February 25, 2016

And the winner is!!!


Thank you to everyone who joined in on the fun and gave me feed back on the new look for my blog.

Congratulations to.....by random draw...... Michelle Wells. Please send me your information so I can send you your gift!

I truly appreciate everyone visiting my blog and as always supporting me. I hope I give you inspiration as you all give me so much inspiration daily. Looking forward adding more projects here along with a fun blog hop coming soon where you can win even more prizes.

Thank you my friends,
Laurie


Thursday, February 18, 2016

Blog Giveaway!!!

Let's have some FUN and do a giveaway!! 
I have a new look to my blog and I want to see how you like it. 

To enter the giveaway follow the rules......
1. Only subscribers to my blog can win, so first make sure you have clicked on "Followers" "Join this blog" on the sidebar to the right. 
2. "Follow me by email" also found on sidebar to the right.
3. There are 4 new projects on my blog (Domino Book, Love Letters, Feather Your Nest, Spring is coming) Go to one of the posts you liked the best and make a comment. You may post comments on all if you would like but must do at least one post comment please.
4. On this post here "Blog Giveaway" comment and tell me if you like the new look of my blog. 

Now what can you win?
I will draw one random winner who has followed all the rules! They will receive a $10 gift certificate from my online Artfire store "Moore Art From The Heart" along with a few other surprise gifts. Drawing will be held
February 25th  

*** If you live in the US the postage for your winnings will be free but if you live outside the US and you win then you will need to paid the postage on your box of winnings. 

Good Luck everyone! Come back here on February 25th and see if you won!!

Have a great day, 
Laurie Moore

Wednesday, February 17, 2016

Domino Book

I have this wonderful friend named Kim Norman who was having a birthday and her daughters wanted to surprise her with a special gift. They asked Kim's friend if we could make small gifts that they could put on a collage that they were putting together for Kim. What sweet daughters! Of course I was happy to add something to it. 
 Something small and fun with a special message inside, a domino book was perfect for this. 


                                     Happy Birthday Kim!
                                                    Hugs, Laurie Moore

Please if you enjoy my post, subscribe and leave a comment. I love knowing you peeked in. Have a super day my friends. 

Tuesday, February 16, 2016

Love Letters

Love is in the air for this Valentine's Day. I thought this project was appropriate for the occasion. I ordered a February kit form The Flying Unicorn Store that came with lots of beautiful items and this wonderful wooden letter set. 


I used the browns and light blue papers from the kit because those colors go well in my living room. I plan to place a photo behind the "O" frame to display. I began by using a few of my own supplies most of which can be found in my online Artfire Store, Moore Art From The Heart....  Prima Art Ingredients Micro Beads in Copper, Distress ink Vintage Photo, Distress embossing powder in Vintage Photo , Distress embossing powder in faded jeans, and Ranger Emboss it Dabber.

After tracing around the letters on to the papers, cutting them out, distressing them and then inking the edges this gave me a base to work with. 
Now using my Emboss it dabber and distress powders I gave it some texture and color. 
I love adding the copper Micro beads to any project. They always add that little something to catch your eye. 

I plan to add a photo in the "O" and realized I had a frame that fit so nicely in the there. The frame was silver so I added a small amount of  Rub N' Buff in blue and gold to match the rest.
The kit came with this beautiful laser cut chipboard which I inked and embossed. Don't you just love the way the blue peeks through? 

The little white metal  Heart Gear  is also something I carry in my store. 
Here's a look at the back. I am going to place this on a shelf where the back does not show.
Hope this project gave you a little inspiration. If so please leave a comment and subscribe to this blog. I choose all my random prize winner from my subbies. Good luck and Happy Valentines Day to all.
Hugs, 
Laurie Moore 

The Flying Unicorn store link.... http://www.flyingunicornstore.com/

Tuesday, January 26, 2016

Feather Your Nest

The tags reads... Don't let life ruffle your feathers! These words remind me to have faith and carry on and not let Life get me down.
I enjoyed added a little whimsy to this burlap feathered bird by giving her a hat.
I started with a large 8 inch wooden spool I picked up in an antique store. Added dried grass beneath the nest along with twigs from my garden, rusty stars and soft feathers. Tied string around the spool to hold the tag. It sit upon a painted paper doily. With more feathers and a small bird cage charm my creation was finished.
Thanks for peeking in on me! Please comment if you enjoyed this creation.

Hugs, Laurie Moore

Spring is coming!

Hi to all my blog Friends. I've been a bit busy over the last 6 months and wasn't getting much craft time in. I'm so happy to say I'm back. I missed visiting with all my crafty friends and sharing what we create. I missed dipping my fingers in inks and paints, sorting through papers and flowers for that prefect look. Scrapbooking has always been an outlet that has fed my soul and I'm loving the time I now have to get back into filling that void.

Let me start with sharing this card I've made. It's winter here in the Northwest and raining quite often which makes me long for warmer Spring days. I've pulled out a box of goodies collected over the years of little feathered birds, tiny plastic eggs, moss in 6 different types, twigs from my garden, leaves from the trees and many found feathers. These say "Spring" to me.
Using ink spray from Ranger in Festive Berries, Worn Lipstick, Picket Fence and one of my favorite Prima stamps with Butterflies I created the background. I added Prima flowers and two of those tiny plastic speckled eggs, along with a white fluffy feather. I then took a chipboard oval and covered in with paper and added the words "Enjoy Life", which is a wonderful saying to remember daily.

Please leave me a comment on what you look forward to in the Spring time.
Many hugs to you my friends,

Laurie