Tuesday, December 2, 2014

Prima Altered Metal Frame Birdhouse

Here's a look at an altered Prima Birdhouse I did for a custom order. The person this is going to, loves gardening and the birds that visit her garden. The banner reads "Home Tweet Home"
Starting with a Prima altered metal frame Birdhouse, I used some watered down white paint and went over the entire birdhouse. I love the look of the birdhouse the way it comes but for this order I needed it to be more in a white to blue tones.
 Using some of the items I carry in my Artfire store I took the Cottage window from The Dusty Attic chipboard collection and painted it in the colors to match.  
  I took the green metal bench, add white gesso and then a light touch of brown paint. I had this tiny clay flower pot that was just the right size, added a dab of paint and flowers to it. 
Flowers from The Dusty Attic in Blue Bonnet were just right to add to the lattice at the back and among the vine of printed flowers from Prima that was attached to the front edge of the frame. 
I have a video on my YouTube channel that shows the Birdhouse from all sides. Come take a peek. https://www.youtube.com/user/MooreArtFromTheHeart
These items are carried in my Artfire store

Thanks for visiting my blog,
Have a great crafty day,
Laurie Moore


Wednesday, October 22, 2014

Gift for Karen "Zucchini Kitty"

Here's a clock and card I made for my good friend Karen, better known as "Zucchini Kitty" on YouTube. She and I share a wonderful friendship and gifts for each other.
For ideas to add character to this clock, I found inspiration over at the blog "Our Creative Corner" the OCC.... http://ourcreativecorner6.blogspot.co.at/ . This months challenge is to "Go Rustic" which happens to be one of my favorite looks in art and nature. I used a rusting powder I bought from The Dusty Attic. You apply an adhesive for the powder to stick to and then spray it down with white vinegar, which I did around the clock face and rim. After a bit of time your item will rust.
 Adding fun rusty embellishments next.... stars, birdhouse, fence, flowers and watering can.


I then made a card to go with the gift also in a rusty fashion using distress inks and sprays. 

Thank you so much for stopping by my blog. 
Here's a link to Karen's Youtube channel
Here's my Youtube channel as well

Thanks from Laurie Moore

Wednesday, October 15, 2014

Halloween Center Piece

Here's my Halloween center piece I created for my blog challenge on Facebook. There's a link below to the challenge. I started with a Pumpkins call "Funkins" I picked up from JoAnn's crafts. The pictures below will give you an idea of how easy and fun this center piece was to do. Once I carved out the openings I lined the inside with black card stock and added the Creepy cloth. I created a table, a bookcase and a few creepy decorations for the inside. To give it that spooky feel I added little tea lights that flicker to the inside. The base is an 11" x 14" canvas covered with foam, card stock and more creepy cloth. Add a few spooky characters, a fence and there you have it a spooktacular center piece.

Also check out my video on Youtube click here...........  Halloween Center Piece


There's a small surprise something in one of the pictures and for a clue of what it is come join my Facebook Challenge and find out what it is. Everyone is invited...
I love reading your comments. Thank you for peeking in on me.
Hugs, Laurie


Saturday, September 27, 2014

Autumnal Image Inspiration - OCC's September Challenge

Claudia Neubacher of Our Creative Corner has given us a beautiful collage photo to work with for the September Challenge. I love anything to do with nature. Thanks Claudia.

 This inspirational collage was just what I had in mind when I saw this photo of my daughter Alicia. She is my nature Girl. She lives with her husband Abe (the Forrester) and two beautiful children in their mountain home surrounded by nature. Awww the country life is sweet!
I went outside and gathered items from my own country home to add to this layout. A few small pinecones, green leaves from the Oregon Grape brush and lichens from a stump in the back yard. The curly twig looking branch running through the arrangement is a Prima vine that had flowers on it that I removed. This twig with it curly spirals reminded me of my daughters beautiful curls. I then added a few earthy toned metal flowers to set it off.
The background paper with it's distressed and curled edges is from KaiserCraft. The chipboard word says what I feel for this sweet girl "Adore". She is my heart.
Thank you visiting me. Check out http://ourcreativecorner6.blogspot.co.at/ for more great ideas and monthly challenges.
Hugs and best wishes,
Laurie Moore

Wednesday, September 10, 2014

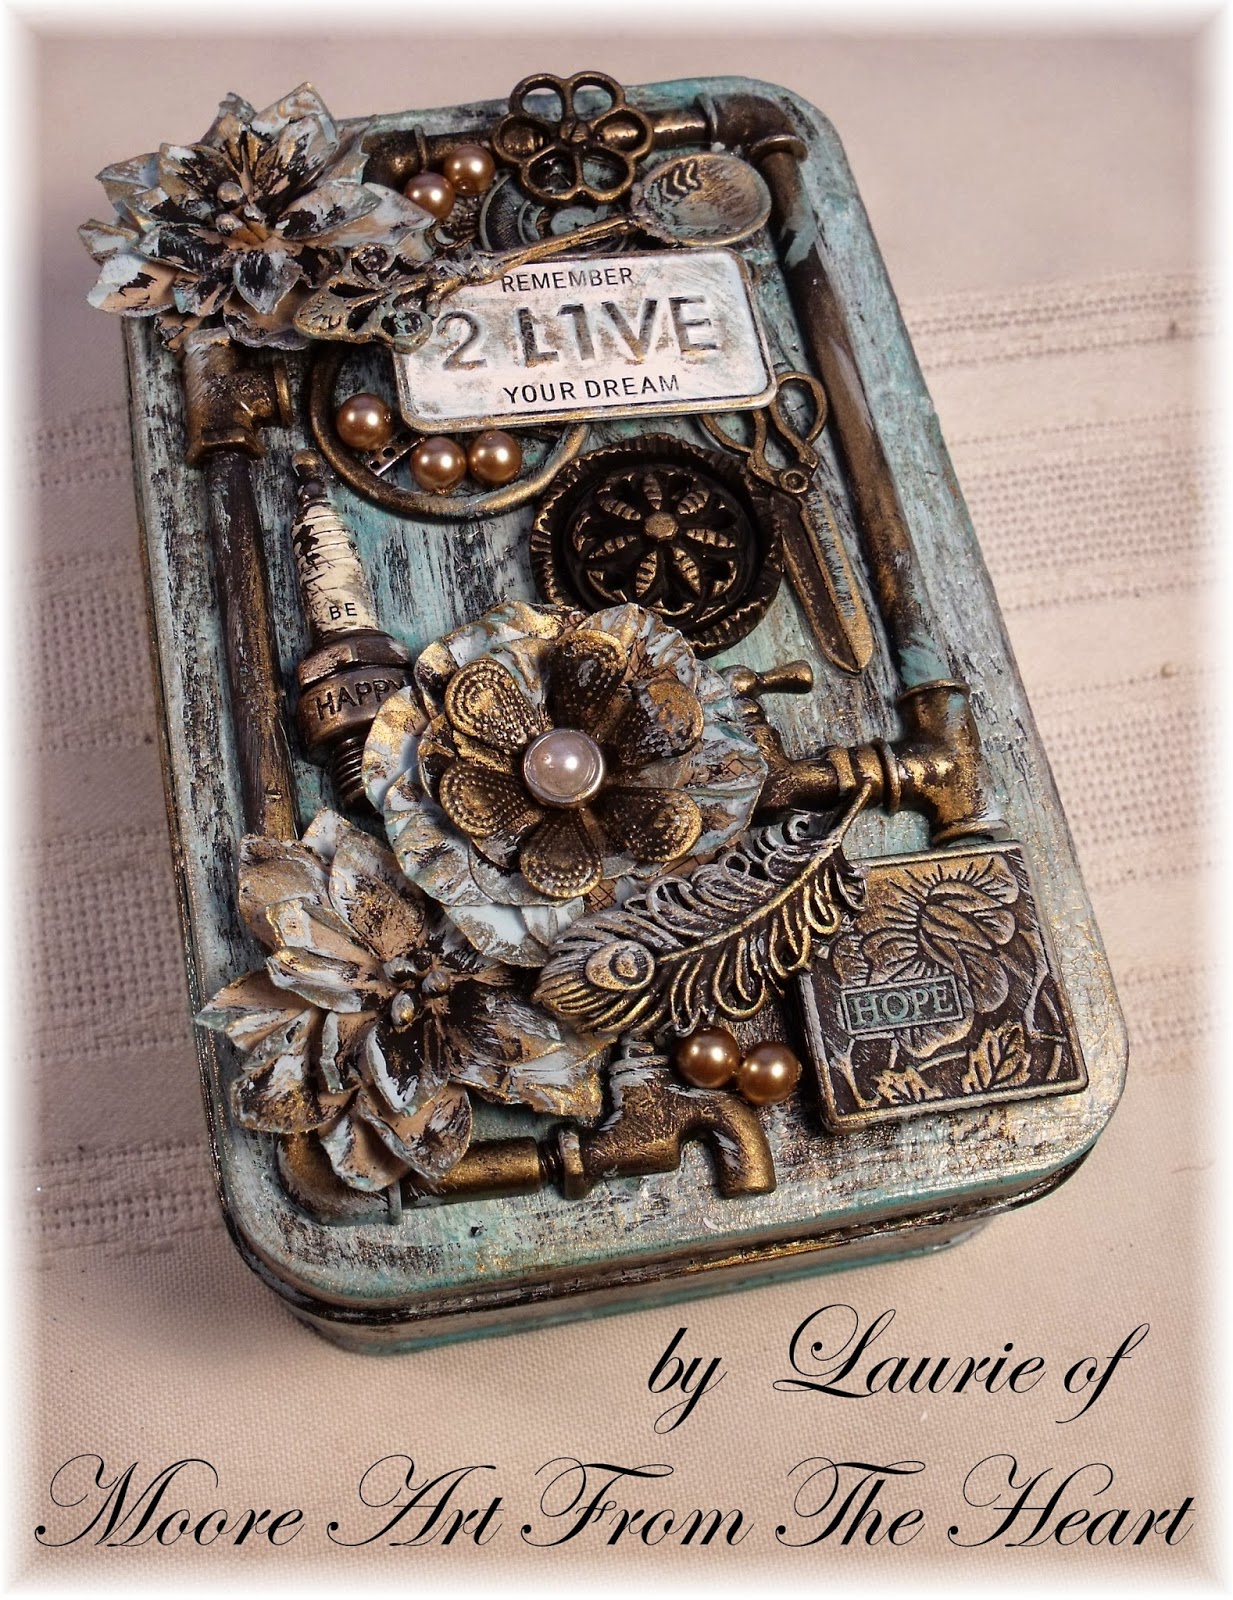
Tin with Painted Patina


I love finding new way to decorate these little metal tins. This time I took a 3 1/2" x 5 1/2" two piece metal tin and created a patina aged look with gesso and paint. First I used black Gesso all over the tin inside and out.  I then took the acrylic paint in two tones of blue and blue green and mixed each color into gesso until I liked the way the colors looked. I painted on many layers with this mixture and then crackle paint in between the layers. Fun textured look don't you think?

The embellishments were painted in the same way. In the next step I went slightly over anything with gold rub n buff. The inside of the tin only had black Gesso and rub n buff. I also added paper that I distress and inked.


Thank you for peeking in,
Hugs from Laurie Moore

Check out the video on my Youtube channel for this project under the name "Tin with Painted Patina" https://www.youtube.com/user/MooreArtFromTheHeart

Also check for kits and other products in my Artfire store... http://www.artfire.com/ext/shop/studio/MooreArtFromTheHeart


Sunday, September 7, 2014

Sweet Hugs

This layout is of my two grand kids ages 3 and 4 years old. They had not seen each other in over a year and when they did they run to each other and hugged and hugged. It was so heart warming.
Here's a look at what I started with.....a 9" x 11" canvas, a mask and gesso. Then I used sprays from Dylusions and Mister Huey's to create a background.  With a stamp from Prima by Finnabair called Timbres transparents which I carry in my Artfire store, I add a little more contrast.


I took a few white flowers and used the same sprays to color the flowers. I then added layers of papers, a wooden fence, metal birdcage, leaves and for a special touch a birds nest and eggs for my two sweet chickadees, my grand-kids. . 


Thank you for peeking in on me again. Please check out my Artfire store for products used on this project and other ones. 
Please also check out my Youtube channel for more great ideas.
Hugs, Laurie